Getting started with RISC-V
Boards, tools and hardware on a budget
So you have heard of this RISC-V thing typically talked about in the context of microprocessors and to a lesser degree also for desktop processors. RISC-V is an open-source hardware instruction set architecture (ISA). Similarly to how X86 for Intel and AMD is a closed source ISA. Being an open-source ISA any manufacturer can develop new processors which implement it. Allowing many of the development tools to be reused across different manufacturers. This has the potential to drastically change the computing landscape. Especially with large companies like Western Digital already investing in the development of this new technology.
Now, lets say you are an computer scientists, developer or embedded systems engineer; how can you benefit from this new ISA and start using it? Do you need to buy dedicated hardware and what kind of options are there at which price? The answer is that no matter the field anyone can get started with RISC-V today. Using either simulators without investing any money or for less than 100$ with dedicated hardware. The RISC-V Foundation maintains a list of tools that are already supported including simulators [1{}}. Anyone could easily start using one of these simulators. This list includes 1) QEMU [2] 2) Renode [3] 3) Spike [4] 4) Ripes ]5], a variety of simulators for different purposes. These simulators are ordered from higher level simulators to lower. Here Ripes is so low level it allows to graphically show the instruction pipeline. Contrarily, QEMU allows emulating a Linux operating systems with the RISC-V architecture.
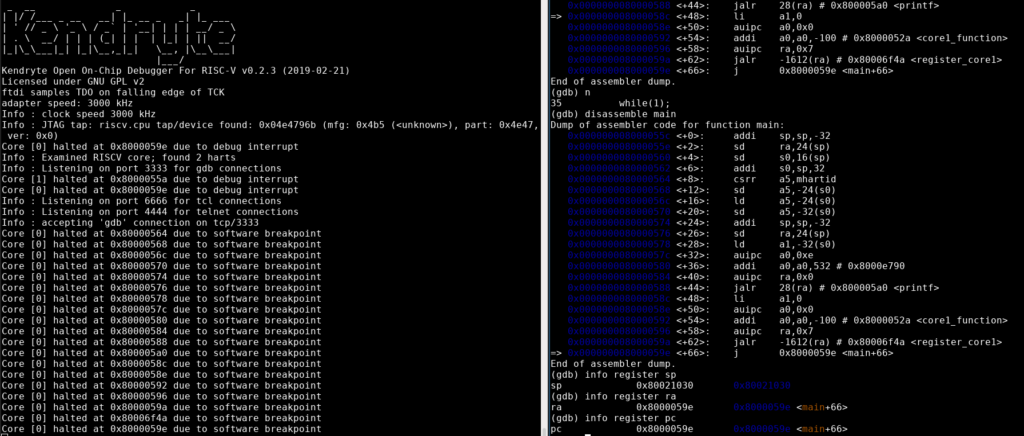
Debugging on a Kendryte K210 RISC-V dual core microprocessor using OpenOCD and GDB.
What to Use to Get Started
Before considering which simulator would best fit with any expectations and desires let´s first show some affordable hardware considerations. Once again the RISC-V foundation maintains a list of ready to buy products based on their ISA [6]. The list is extensive but should be filtered on soc’s only as FPGA soft-cores are likely to be outside the scope of interest. Still the price range of the soc’s offered is large ,therefor the following three options are likely best candidates:
 |
 |
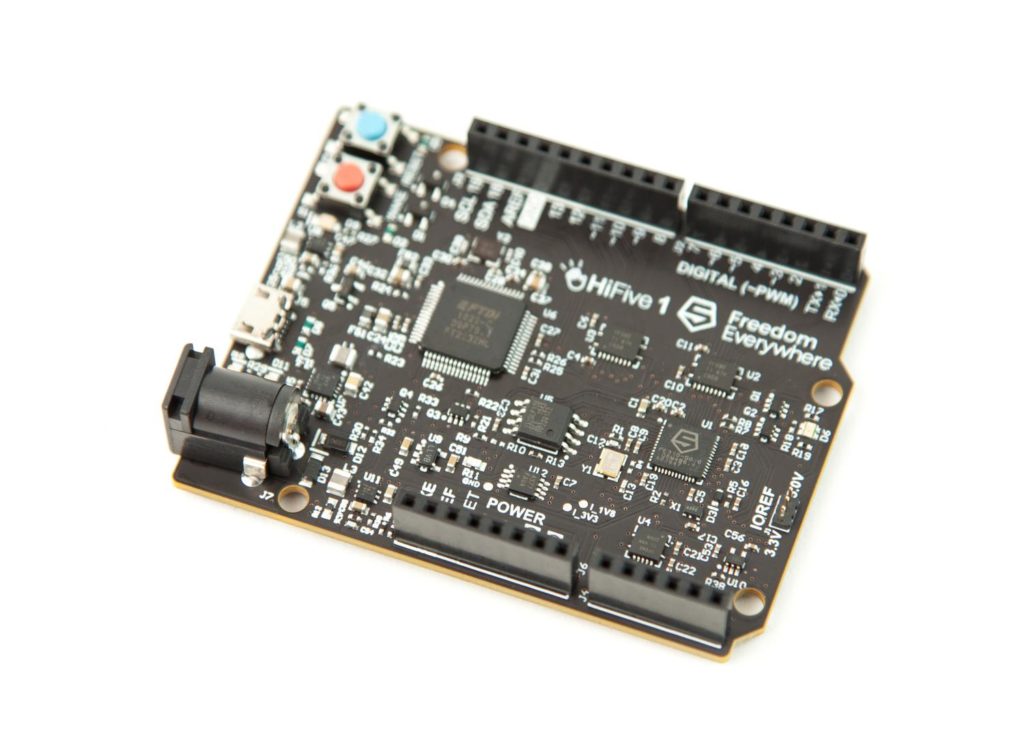 |
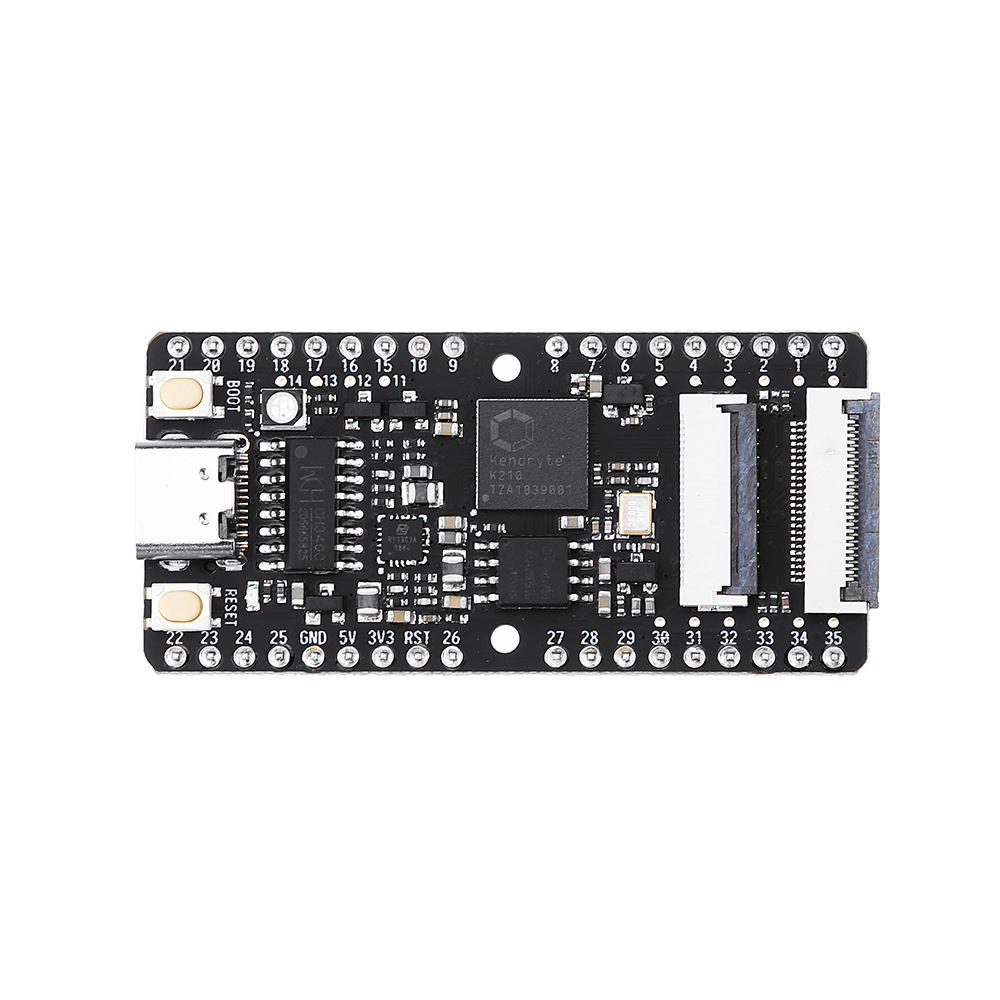
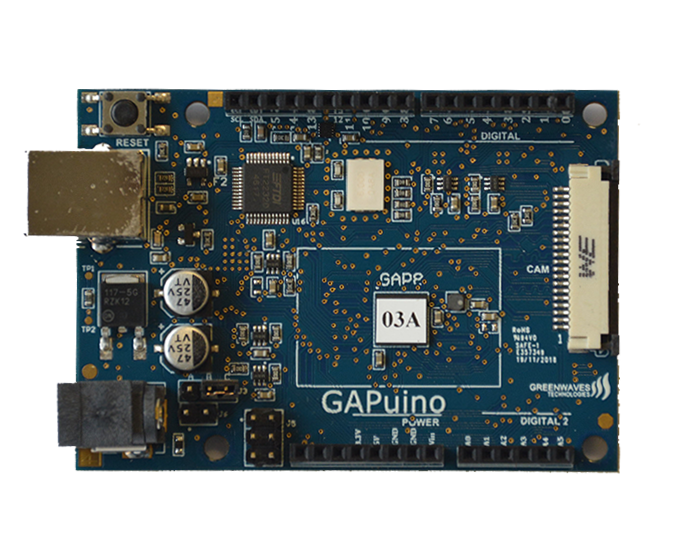
| Maix Bit – 13$ | GAPuino – 100$ | HiFive1 – 59$ |
All of these solutions offer a USB interface for serial communication and uploading applications. However, not all of them contain an onboard debugger. So for the Maix Bit a JTAG debugger is needed to perform step-by-step debugging with GDB. By far the best solution of these three boards is still the Maix bit which can be bought on SeedStudio for just 13$. This is the only option of the three offering a 64bit dual-core processor with an additional AI core. When making the decision to buy the Maix Bit an accompanying debugger should also be purchased. Unfortunately, a debugger that officially works for all three devices does not exist. However, the debugger offered with the Maix Bit is based on the FTDI FT2232D which should allow it to work with both the GAPuino and HiFive1 as well.
Preparing the Tools
In order to use these simulators or microprocessors tools are needed. The installation of all tools required is covered regardless of the subsequently chosen platform. Because of this both 32 and 64 bit compilers for both native ELF and Linux ELF binaries are covered. To keep the installation simple and explain the tools later were necessary a simple step by step list of commands is provided. Upon the successful completion of all these commands all required tools for any subsequent platform will be installed. An attempt is made to cover the prerequisites for the most common Linux distributions. Windows will not be supported and on OSX homebrew [7] will be required. Install the prerequisites below based on your operating systems before continuing with building the RISC-V toolchain.
| Ubuntu | Fedora / CentOS / RHEL | OSX |
sudo apt-get install autoconf automake autotools-dev curl libmpc-dev libmpfr-dev libgmp-dev gawk build-essential bison flex texinfo gperf libtool patchutils bc zlib1g-dev libexpat-de |
sudo yum install autoconf automake libmpc-devel mpfr-devel gmp-devel gawk bison flex texinfo patchutils gcc gcc-c++ zlib-devel expat-devel |
brew install gawk gnu-sed gmp mpfr libmpc isl zlib expat |
The riscv-gnu-toolchain will download around 250 megabytes of data and build two independent complete toolchains in the /opt/riscv directory. One of these toolchains can be used to compile ELF binaries that can be executed directly on simulators or microprocessors. The other toolchain is used to compile ELF binaries that can be executed by a running Linux kernel. The total install size will be around 2 gigabytes.
git clone --recursive https://github.com/riscv/riscv-gnu-toolchain
cd riscv-gnu-toolchain
sudo mkdir /opt/riscv
sudo chown $USER /opt/riscv
./configure --prefix=/opt/riscv
make -j $(nproc)
unset LD_LIBRARY_PATH
./configure --prefix=/opt/riscv --enable-multilib
make linux -j $(nproc)
The Next Steps
In subsequent blog posts using several of the simulators as well as working with the Maix Bit and accompanied debugger will be covered. Some of the simulators will be used to look at assembly instructions and how they are executed. Others will look at simple hello world examples written in C++. The post about the Maix Bit will cover the use of the Kendryte standalone SDK. In preparation for these posts one can buy both the Maix Bit and debugger from SeedStudio using the following links: Maix Bit, RV Debugger
References